
Architectural Details on a Budget: Adding Character with Trim, Molding, and Paneling
Architectural Details on a Budget: Adding Character with Trim, Molding, and Paneling
Plain walls provide a clean starting point, but they can sometimes leave a room feeling unfinished or lacking in personality. Architectural details such as board and batten, wainscoting, picture frame molding, vertical paneling, and decorative trim can transform those simple surfaces without requiring a complete renovation.
These features introduce depth, rhythm, shadow, and craftsmanship. They can make a recently built home feel more established, give an ordinary room a custom appearance, and help connect modern furniture with traditional architectural elements. With careful planning and affordable materials, many of these upgrades are also accessible to beginners.
Why Architectural Details Make Such a Difference
Wall molding changes the way light moves across a room. Instead of falling onto one completely flat surface, natural and artificial light creates subtle highlights and shadows around every rail, frame, and panel. This added dimension can make even a restrained neutral palette feel layered and interesting.
Architectural trim can also improve the proportions of a room. Horizontal rails can make a tall wall feel more balanced, while vertical boards can visually increase height. Picture frame molding introduces structure to large empty walls, and paneling can define an entryway, dining area, office, or reading corner without changing the floor plan.
Choose a Style That Suits the Room
Before buying materials, consider the architecture, furniture, and overall mood of the space. A relaxed farmhouse interior may suit wide board-and-batten panels, while a traditional dining room can benefit from classic wainscoting. Narrow picture frame molding works beautifully in elegant bedrooms and living rooms, whereas vertical paneling complements cottage, Scandinavian, coastal, and contemporary interiors.
The detail does not need to match one specific historical style. Simple profiles painted in a modern color can bridge traditional craftsmanship and contemporary decoration.
1. Board and Batten for Relaxed Structure
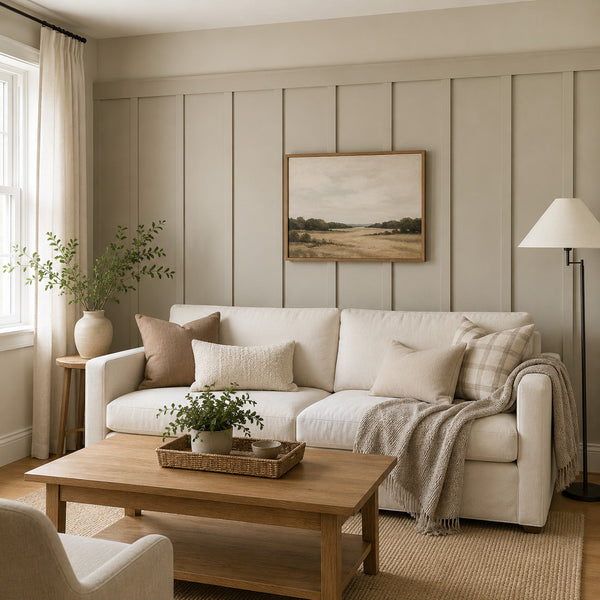
Board and batten is one of the most approachable ways to give a plain wall architectural character. The design uses vertical strips arranged at regular intervals, usually finished with a horizontal top rail. It can cover the lower portion of a wall or extend from the baseboard to the ceiling.
Half-height board and batten creates a comfortable, informal look in living rooms, hallways, bedrooms, and dining areas. Full-height installation has a stronger visual impact and can emphasize ceiling height.
- Use evenly spaced vertical strips to create a calm, organized rhythm.
- Paint the trim and wall in the same color for a seamless built-in appearance.
- Choose warm white, greige, taupe, muted green, or soft beige for a timeless result.
- Keep the profiles relatively simple in small or contemporary spaces.
2. Wainscoting for Dining Rooms and Hallways
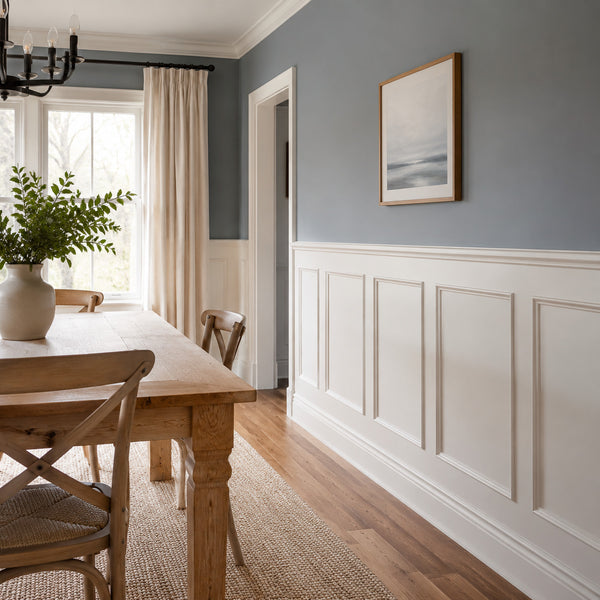
Wainscoting traditionally protects the lower part of a wall while adding decorative structure. Today, it remains an effective way to introduce classic character into dining rooms, stairways, entrance halls, and living areas.
A beginner-friendly version can combine a horizontal chair rail with rectangular frames or flat panels below it. Painting the entire lower section in one color helps the individual pieces read as a single architectural feature.
Wainscoting can be subtle or dramatic. White and cream create a bright, traditional effect, while charcoal, navy, deep olive, or warm brown produce a more contemporary and atmospheric result.
3. Picture Frame Molding for Elegant Walls
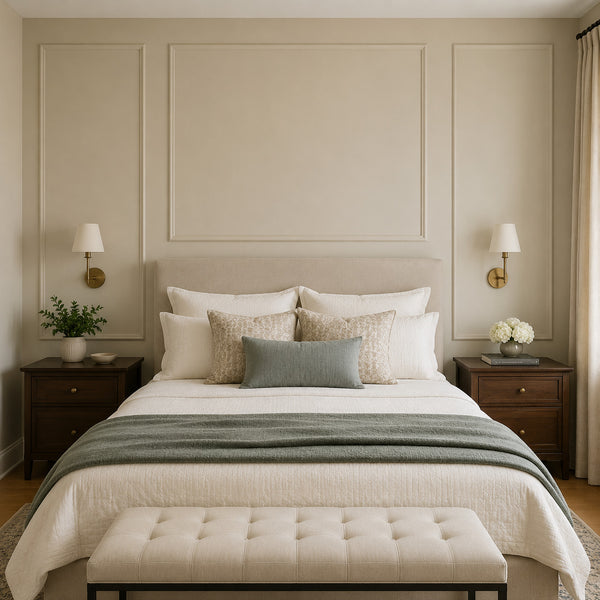
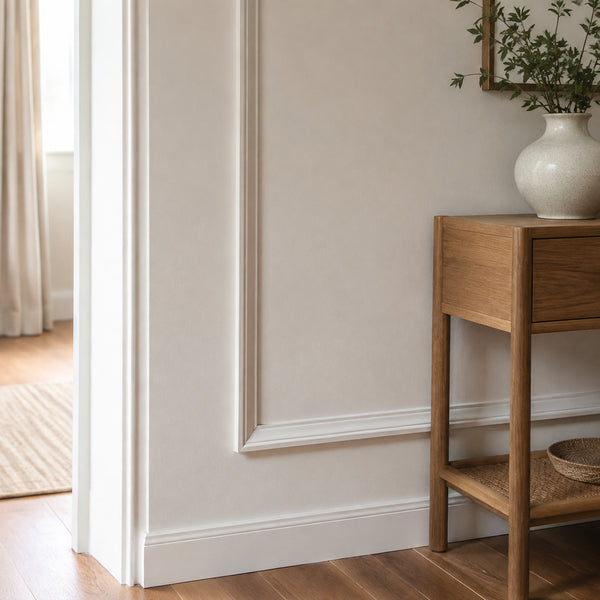
Picture frame molding consists of narrow strips arranged into rectangular or square frames directly on the wall. It is particularly effective behind a sofa, around a bed, along a hallway, or across a large dining room wall.
The success of this detail depends more on proportion and spacing than on expensive materials. Equal gaps between frames create an orderly composition, while aligning the molding with furniture and architectural features makes the finished wall feel intentional.
- Create one large central frame behind a bed or console table.
- Use repeated vertical rectangles along a hallway or dining room.
- Position frames symmetrically around doors, windows, or fireplaces.
- Paint everything in one color to disguise joints and create visual unity.
4. Vertical Paneling for Small Functional Areas
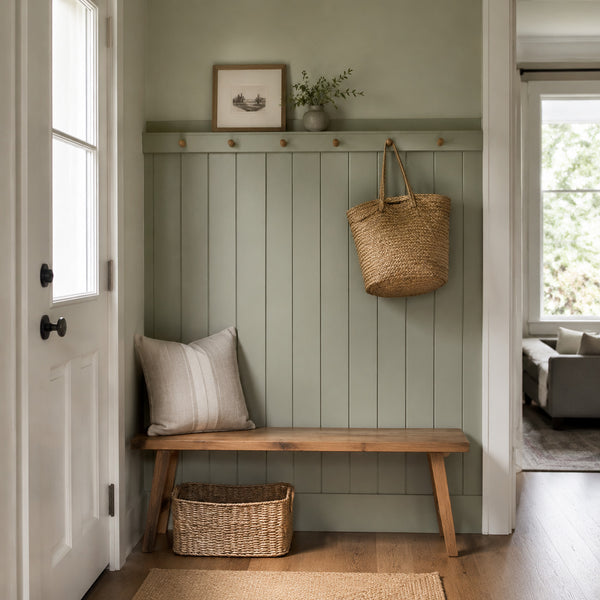
Vertical tongue-and-groove panels, narrow wood strips, or simple applied battens can give an entryway or compact room a stronger identity. Their upward direction draws the eye toward the ceiling and can make a restricted space feel taller.
This treatment is especially useful in a practical drop zone. A wooden bench, peg rail, wall hooks, baskets, and vertical paneling can turn a previously unused wall into an organized entrance area. Muted sage, dusty blue, warm grey, or creamy white work particularly well with natural wood and woven storage.
5. Geometric Trim for a Contemporary Accent
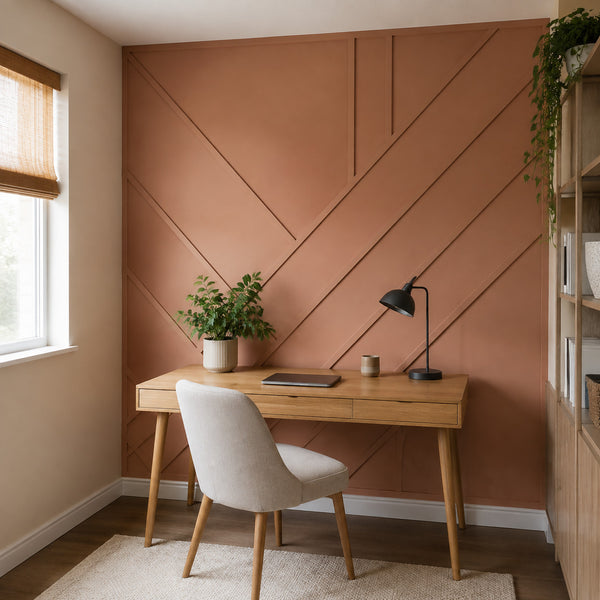
Decorative wall trim does not have to follow traditional rectangles. Thin strips can be arranged into an asymmetrical or geometric composition for a more contemporary effect. This approach works well in home offices, creative rooms, media spaces, and modern bedrooms.
Because geometric arrangements attract attention, they are usually most effective on one focal wall. A restrained paint color allows the shadows and changing angles to provide the decoration without overwhelming the room.
Affordable Materials to Consider
Creating architectural character does not always require solid hardwood or elaborate custom millwork. Depending on the room and desired finish, affordable materials can include MDF strips, lightweight molding, pine battens, pre-cut decorative trim, or smooth panel sheets.
- MDF: Smooth, affordable, and suitable for painted interior details.
- Pine strips: Useful when a natural wood finish or visible grain is desired.
- Pre-cut molding: Convenient for picture frames and more decorative profiles.
- Panel sheets: A practical option for quickly covering larger wall areas.
- Construction adhesive and finishing nails: Commonly used to secure lightweight trim.
- Wood filler and paintable caulk: Essential for creating a neat, integrated finish.
Planning the Layout Before Installation
Careful planning can save materials and prevent awkward spacing. Measure the complete width and height of the wall, then note the positions of switches, electrical outlets, doors, windows, radiators, and existing baseboards.
Sketch the design on paper or use painter’s tape to mark the proposed layout directly on the wall. Painter’s tape provides an immediate sense of scale and makes it easier to adjust panel sizes before cutting anything.
When creating repeated frames or battens, calculate the total width occupied by the trim and divide the remaining space into equal gaps. Minor mathematical preparation usually produces a much more professional result.
A Beginner-Friendly Installation Process
- Prepare the wall: Clean the surface and repair noticeable holes or damaged areas.
- Test the layout: Use painter’s tape to confirm the proportions and spacing.
- Mark level lines: Establish accurate horizontal and vertical guides.
- Cut the pieces: Label each section so the arrangement remains organized.
- Attach the trim: Install the pieces according to the planned layout.
- Fill the joints: Cover nail holes and small imperfections with suitable filler.
- Caulk the edges: Seal narrow gaps between the trim and wall for a built-in appearance.
- Prime and paint: Finish the wall and molding together for a unified result.
Paint Strategies That Enhance the Detail
Painting the wall and applied trim in the same color is one of the easiest ways to make affordable materials look architectural. The unified surface allows the raised profiles and shadows to become the main feature.
A soft matte or eggshell finish creates a calm wall appearance, while a slightly more durable finish can be useful in hallways, entryways, and dining spaces. Darker colors emphasize depth and produce stronger shadows. Light neutrals feel airy and subtle, especially when combined with warm woods, linen, boucle, stone, and ceramics.
Room-by-Room Applications
- Living room: Full-height picture frame molding or relaxed board and batten behind the sofa.
- Dining room: Half-height wainscoting combined with wallpaper or a contrasting upper wall.
- Bedroom: One large framed panel behind the headboard for an affordable focal point.
- Entryway: Vertical paneling with hooks, a peg rail, seating, and concealed storage.
- Home office: A geometric accent wall or narrow repeated frames behind the desk.
- Hallway: Simple repeated molding that introduces rhythm to a long passage.
Common Mistakes to Avoid
- Starting installation without first testing the scale of the design.
- Using panels that are too small for a large wall or too wide for a narrow room.
- Ignoring electrical outlets and switches when calculating the spacing.
- Leaving visible gaps, nail holes, or unfinished joints before painting.
- Combining too many decorative profiles in one small space.
- Choosing proportions that conflict with nearby windows, doors, or furniture.
Final Thoughts
Architectural character is not limited to historic properties or expensive custom renovations. A few carefully planned pieces of trim can make plain walls feel considered, established, and connected to the rest of the interior.
Board and batten brings relaxed structure, wainscoting adds traditional depth, picture frame molding creates elegance, and vertical paneling introduces height and practical character. By starting with one manageable wall, choosing suitable proportions, and finishing every joint carefully, it is possible to create a convincing custom-built appearance on a realistic budget.