
Anchor Cues and Tactile Thresholds: Use Wearables, Circadian Lighting & Passive Sensors to Automate Micro‑Movements in Your Home Office
Introduction
In 2025, remote and hybrid work are the norm for millions of knowledge workers. The convenience of working from home comes with hidden costs: prolonged static postures, reduced incidental movement, and a fragmented day that can erode both productivity and long-term musculoskeletal health. This expanded guide walks through a practical, science-backed approach to designing an automated micro-movement system in your home office using anchor cues, tactile thresholds, wearables, circadian lighting, and passive sensors.
What this article covers
- Foundational science behind micro-movements, anchor cues, and tactile thresholds
- Device categories and how to choose them
- Detailed automation flows and example configurations
- Calibration protocols and measurement techniques
- Accessibility, privacy, and security best practices
- Costs, ROI, troubleshooting, and a step-by-step rollout checklist
Why micro‑movements matter
Micro-movements are short, frequent physical actions that break static postures and stimulate circulation, joint mobility, and cognitive refresh. Rather than replacing longer exercise sessions, micro-movements complement them by preventing the physiological downsides of continuous sitting. Evidence from occupational health and chronobiology shows that even brief, regular postural shifts and low-intensity activity reduce back and neck discomfort, improve glucose regulation, and maintain alertness across the workday.
Core concepts: anchor cues and tactile thresholds
- Anchor cues are reliable, repeatable environmental signals that signal a specific action. Their power comes from consistency and associative learning.
- Tactile thresholds are the smallest haptic stimulus an individual reliably perceives and responds to. Below the threshold, cues are ignored; above it, they can be noticed, possibly interrupting focus if too intense.
- Design goal: hit the sweet spot where cues are salient enough to trigger a brief movement but subtle enough to preserve flow.
Physiology behind tactile thresholds and haptics
Tactile perception varies by body site, age, skin condition, and device. Fingers and wrists have dense mechanoreceptor populations and detect low-amplitude vibration easily. The forearm and torso require stronger stimuli. Haptic perception also adapts over time: a vibration pattern that was noticeable at first may require minor adjustments weeks later. This neuroplasticity can be used advantageously: consistent cues become anchored, meaning their required intensity can drop as the association strengthens.
Types of cues and why multimodal design wins
- Haptic cues: private, personal, low-disruption, wearable-centered. Best for individual nudges.
- Visual cues: light pulses, subtle color temperature shifts, LED indicators. Useful for shared spaces or for users with reduced tactile sensitivity.
- Auditory cues: short chimes or tones. Higher chance of disturbing others; should be used sparingly or at low volumes.
- Combined cues: a soft vibration plus a tiny light shift increases reliability without being intrusive.
Device categories and selection guidance
Choose devices that support programmability and reliable integrations. Aim for local control where privacy is a priority, and prioritize devices with robust firmware updates.
Wearables
- What to look for: programmable haptic patterns, long battery life, good integration with your automation platform, and a comfortable fit.
- Placement: wrist is common, but chest straps or clip-on wearables can be used for stronger tactile perception if needed.
- Battery considerations: frequent haptics can accelerate drain. Test expected cadence before finalizing settings.
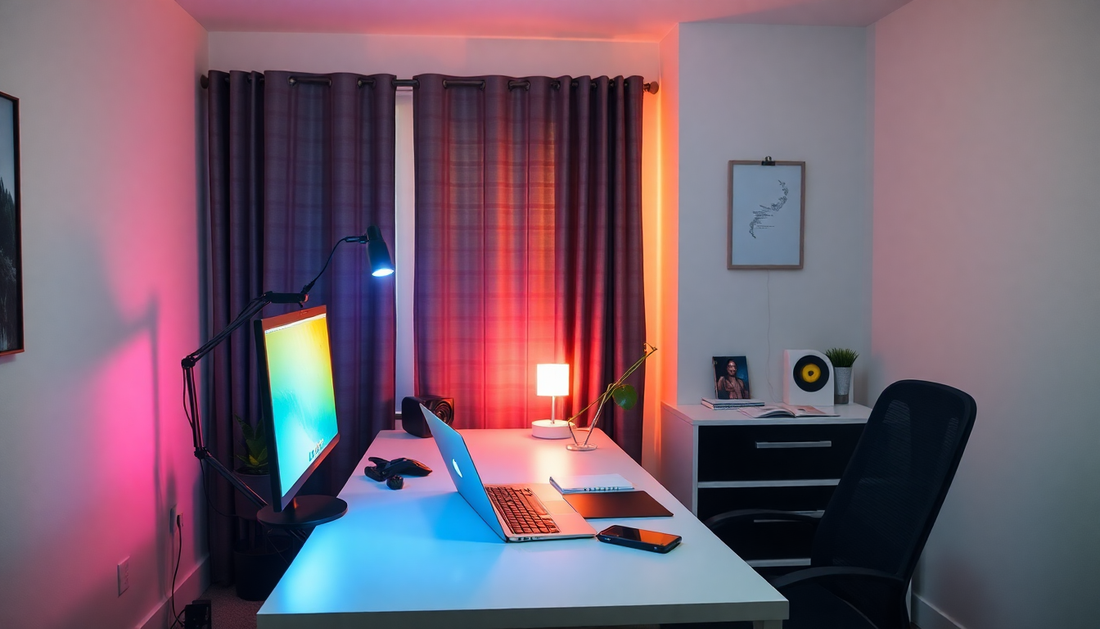
Circadian-capable lighting
- Key features: tunable white (adjustable Kelvin), sufficient brightness range, programmable scenes, and local API or hub integration.
- Use-case: subtle, short shifts in color temperature or brightness act as non-verbal anchor cues while simultaneously supporting circadian alignment.
Passive sensors
- Occupancy sensors: pressure mats, chair sensors, and under-desk contact sensors detect continuous sitting.
- Motion sensors: detect lack of movement but can be fooled by fidgeting or nearby movement.
- Posture sensors: dedicated sensors or wearable IMUs that detect slouching or forward head position.
- Environmental sensors: CO2 and ambient light provide context for alertness and can adjust cueing intensity.
Automation platforms and orchestration
Choose a platform that matches your privacy and technical comfort level.
- Home Assistant: powerful, local-first, supports extensive device integrations and complex automations.
- Hubitat: local processing with strong Z-Wave/Zigbee support and reliable rule engines.
- Apple HomeKit + Shortcuts: excellent for Apple-centric households and calendar-aware automations.
- Commercial cloud ecosystems: SmartThings or vendor cloud services may be simpler but expose more data externally.
- Hybrid setups: combine local automation with selective cloud features for voice assistants or cross-vendor integrations.
Design principles for low-friction automation
- Make cues predictable and consistent so they become anchored to behavior.
- Favor private haptics first; escalate to visual or audio only if haptics fail or if accessibility requires it.
- Respect context: silence cues during meetings, when headphones indicate a call, or when calendar status is busy.
- Start sparse and increase density only when adoption is high. Over-cueing causes annoyance and disablement.
- Measure and iterate: log events and perceived usefulness to refine timing and thresholds.
Calibration: measuring and setting tactile thresholds
Calibration is a critical step. Use a simple protocol to define your detection threshold and comfortable intensity range.
- Step 1 — baseline detection: with the wearable in your usual position, ask for a single short vibration and note whether you perceive it in three trials at different intensities.
- Step 2 — subtle vs noticeable: identify the lowest intensity consistently perceived and the highest intensity that still feels non-startling.
- Step 3 — contextual tests: repeat trials while typing, during video calls, and while leaning back to identify context-dependent thresholds.
- Step 4 — set working intensity: pick a value 10-30% above the detection threshold, adjusting for context. Document it and recheck after one week.
Sample calibration log template
- Wearable model and placement
- Trial date and time
- Intensity level tested
- Detected? yes/no
- Startled? yes/no
- Notes on context (typing, meeting, relaxed)
Micro-movement taxonomy and choreography
Micro-movements should be short, safe, and performable without special equipment. Build a menu of movements grouped by goal: mobility, circulation, posture reset, and cognitive reset.
Mobility micro-movements
- Seated hip circles: 10 seconds
- Thoracic rotations (seated): 10–15 seconds per side
- Seated ankle pumps: 15–20 seconds
Circulation micro-movements
- Calf raises while standing: 15–20 seconds
- Short walk: 5–10 steps, 10–20 seconds
- Finger and wrist pumps: 10–15 seconds
Posture reset micro-movements
- Scapular squeezes: 10 seconds
- Chin tucks and neck slides: 10–12 seconds
- Pelvic tilts in seated position: 10 seconds
Cognitive reset micro-movements
- Deep breathing with arms overhead: 10–15 seconds
- Eyes-off-screen focal shifts: look at a distant object for 10 seconds
- Standing stretch combined with light exposure: 15 seconds
Progression strategy
- Weeks 1-2: target simple 10–20 second movements every 30–45 minutes.
- Weeks 3-4: increase frequency to every 20–30 minutes if tolerated. Add slightly longer breaks after 2–3 micro nudges.
- Month 2+: personalize based on comfort and outcome metrics such as reduced neck pain or improved afternoon alertness.
Implementation recipes and sample automations
Below are concrete, platform-friendly recipes. Adapt parameters to taste and hardware.
Recipe 1 — Home Assistant: occupancy + wearable haptic
- Trigger: binary sensor 'desk_pressure' changes to 'on' for continuous 30 minutes
- Condition: calendar event not set to busy; microphone not in use
- Action: call wearable integration service to trigger 2-second vibration pattern; mark event in the logbook
- Follow-up: if no motion sensor change within 90 seconds, send a second vibration and optional gentle light pulse
Example pseudocode for clarity (adapt to your integration):
- trigger: platform: state entity_id: sensor.desk_pressure to: 'occupied' for: '00:30:00'
- condition: platform: template value_template: 'not is_calendar_busy() and not microphone_active()'
- action: service: wearable.vibrate data: pattern: 'short_double' intensity: 30
Recipe 2 — Apple Shortcuts + HomeKit: calendar-aware light nudge
- Trigger: timer or Focus status change at defined work block intervals
- Action: HomeKit light temporarily shifts to a cooler temperature and slightly higher brightness for 30 seconds, then reverts
- Secondary action: if paired Apple Watch detects minimal movement, send haptic through a watch shortcut or notification
Recipe 3 — Hubitat/local hub: posture sensor escalation
- Trigger: posture sensor detects slouch for 90 seconds
- Action: immediate, short vibration; if posture not corrected after 60 seconds, flash desk lamp and log a posture event
- Safety: provide easy ignore or snooze that records reason to refine personalization
Logging, metrics, and measuring success
To know whether your automation improves outcomes, track a modest set of metrics for 4–8 weeks.
- Objective metrics: number of micro-nudges delivered, response rate (movement detected after cue), cumulative standing time, and midday alertness proxies (typing speed, error rates if available).
- Subjective metrics: daily pain ratings for neck/back (0–10), perceived energy, and focus quality.
- Behavioral metrics: number of times automations are disabled or snoozed, and frequency of calendar-aware deferrals.
Privacy, security, and ethical data handling
- Minimize raw data collection: store boolean occupancy and event timestamps rather than continuous sensor streams when possible.
- Prefer local processing: local hubs and on-device automations reduce cloud exposure.
- Secure your network: isolate IoT devices on a separate VLAN, enforce strong passwords, and keep firmware updated.
- Transparent logging: if multiple household members are affected, share an explanation and opt-out method.
Accessibility and inclusivity
Design automations that account for differing sensory needs and mobility limitations.
- Provide multiple cue channels: haptic + visual + gentle audio so users who cannot perceive one channel still benefit.
- Allow adjustable thresholds and alternative movement suggestions that are safe for users with limited mobility.
- Offer extended snooze and scheduling options for care responsibilities, fatigue, or neurodivergent processing.
Troubleshooting common problems and fixes
- Problem: cues are ignored. Fix: increase intensity slightly, change pattern to a more distinctive rhythm, or add a visual cue for redundancy.
- Problem: frequent false positives. Fix: add debounce time, reposition sensors, or combine sensors (pressure + motion) to require agreement.
- Problem: battery drain on wearables. Fix: reduce cue frequency, optimize haptic intensity, or choose times when cues are most needed.
- Problem: system feels intrusive during focused flow. Fix: integrate calendar and Focus modes to mute cues during scheduled deep work blocks, and use a graceful escalation model.
Cost tiers and budget examples (2025)
Costs vary widely based on whether you use budget or premium devices. Below are approximate tiered setups for planning.
- Budget tier (approximate): basic fitness band with haptics, single smart bulb, cheap PIR motion sensor. Expected cost: low to moderate.
- Mid tier: mainstream smartwatch with programmable haptics, tunable white desk lamp, chair occupancy sensor, and local hub. Expected cost: moderate.
- Premium tier: high-end wearable with advanced haptic SDK, integrated circadian lighting system across the room, multiple posture and pressure sensors, and a robust local automation server. Expected cost: higher but enterprise-grade experience.
Estimating ROI
Quantifying ROI depends on individual context. Consider these tangible benefits:
- Reduced discomfort and fewer stretches leading to lower short-term breaks for pain management.
- Improved afternoon productivity resulting in time saved or higher-quality output — even small gains compound.
- Potential long-term healthcare savings from fewer musculoskeletal complaints and better metabolic markers tied to reduced sedentary time.
Example calculation: if micro-movement automation reduces afternoon low-productivity time by 30 minutes per day for a full-time knowledge worker, that translates to roughly 2.5 hours per week regained for focused work, which is significant across months and teams.
Hypothetical case studies
Two short scenarios illustrate common outcomes.
Case 1 — The Focused Designer
- Problem: long deep work sessions with back stiffness and afternoon energy dips.
- Solution: wearable haptics every 30 minutes, short light pulses aligned to circadian profile, and a posture sensor escalation for slouching.
- Result: reduced stiffness, fewer interruptions in deep work due to scheduled micro-breaks, and improved afternoon energy.
Case 2 — The Remote Team Lead
- Problem: frequent meetings and difficulty remembering to stand between calls.
- Solution: calendar-aware automations that schedule micro-movement nudges only during available slots, with gentle chair pressure detection for long sitting.
- Result: better habit formation without missed nudges during meetings, and easier tracking of daily movement compliance.
Advanced topics and future directions
- Context-aware AI: future automations could adjust cue timing based on biometric signals such as heart rate variability or eye tracking to optimize when nudges are most effective.
- Adaptive haptics: systems that automatically lower intensity as cues become anchored, reducing energy use and intrusiveness.
- Team-level deployments: privacy-preserving aggregation could enable organizations to encourage healthy movement without individual surveillance.
Full rollout checklist
- Pick your minimal viable setup: one wearable, one sensor, one light.
- Install and position sensors; confirm reliable occupancy detection.
- Calibrate wearable haptics and document the working intensity.
- Create a single automation rule to start (30 minutes sitting -> one haptic cue).
- Monitor objective and subjective metrics for one week, then iterate.
- Expand to additional cues and contextual rules once initial adoption is stable.
Ethical and social considerations
- Consent and transparency: if automations affect others in shared spaces, communicate settings and provide opt-out options.
- Data minimization: log only the events you need for behavior change and analytics.
- Non-coercive design: nudges are most effective when voluntary and respectful. Avoid punitive or shaming mechanisms.
Final thoughts and recommendations
Designing an automated micro-movement system is both a technical and behavioral challenge. Start with a simple, private haptic nudge paired with occupancy detection, then gradually layer in subtler circadian lighting cues and posture sensors. Calibration and respectful timing are the keys to maintaining adoption and avoiding annoyance. Over weeks, anchor cues become reliable triggers that turn tiny movements into consistent habits, delivering measurable benefits to comfort, alertness, and productivity.
Action plan: 7-day pilot
- Day 1: Install devices, run calibration protocol for your wearable, and set the initial automation to 30-minute intervals.
- Days 2-3: Log subjective energy and any annoyances. Adjust haptic intensity if cues are missed or too strong.
- Day 4: Add a visual light pulse as redundancy for times when haptics are less effective.
- Day 5: Integrate calendar conditions to prevent nudges during meetings.
- Day 6: Review logs for response rate and adjust timing to maximize response without increasing intrusiveness.
- Day 7: Decide whether to scale frequency or introduce posture-based escalations.
Conclusion
Anchor cues and tactile thresholds provide a practical framework for automating micro-movements in the home office. By combining wearables, circadian lighting, and passive sensors with thoughtful automation rules, you can create a low-friction habit engine that protects physical health and supports cognitive performance. Start modestly, measure meaningfully, and iterate with an eye toward privacy and inclusivity. Small nudges, delivered consistently, compound into large improvements in wellbeing and work quality.
Call to action
Ready to test a pilot? Choose one wearable, one sensor, and one light. Implement a single 30-minute automation rule, run the 7-day pilot, and track three simple metrics: response rate, perceived energy, and any discomfort change. Report back your findings and next steps to refine your personalized system.